Bob's Lost In Space B9 Robot Project | home
Misc. Parts | Motor Shaft Extensions | Knees & Hinges | Treadsections | Tread Making | TreadMaking from Tires | Drive Parts | Drive & Tread Installation | Tread movie | Barry's Tread Movies | Drive Upgrade | Legs | Donut & Waist plate | First Stackup | Torso | Neon | Arms | Microphone & Knob | Chest Buttons | Power Pack | Torso Vents Misc | Making Vents | Large Vent Drawings | Arm Mechanism #1 | B9 Arm Mech Dev. | Wrists & Claws | Collar | Radar | Motorizing Ears | Making Sensors | Brain | Brain Cup & Light Rods | Bulbs & Wiring Diagrams | My Old Robots | B9 Builder's & Info Sites | Related Links | Building Reference Info | Parts Drawing Links | Site Revisions | Final Leg Assembly | Leg & Hip Assembly | Leg-Hip Action | Non-B9 Projects | 2008 TX BUILD-OFF | 2008 TX BUILD-OFF PAGE 2 | RoboCon 2009
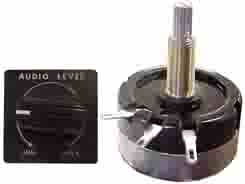
The microphone (mic) for the robot can be made in several ways. I chose to use the following method made from a cabinet knob that club member Craig R. first found at Home Depot & I originally got one there too. So thanks for the idea Craig!

I started out by taking the mic screen off an old mic I had laying around and purchasing a cabinet knob for about $2. The knob is 1.25" in diameter.
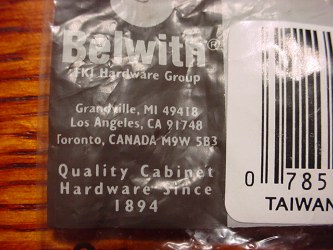
I bought this knob at Home Depot a long time back, I checked recently and the ones they have now are slightly different, so you may have to look elsewhere to find one that will work. I did find them at Menard's home centers in Iowa. Here is a copy of the knob info off the package.
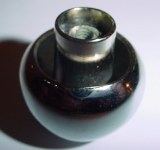
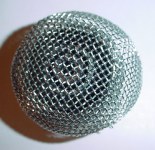
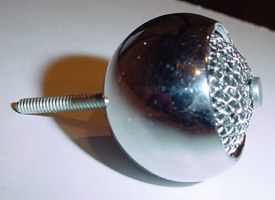
Here is the knob before I cut a portion of the mount off of it.
First I cut off most of the knob's mount using a Dremel and cutting wheels. Leaving enough height for the screen to rest against and be held in place by the center bolt. This side will become the front of the mic. Then I drilled out the original threaded center hole all the way through what used to be the front of the knob.
It is hard to see here but then I positioned the screen over the knob to mark with a Sharpie where to cut it. It needs to be cut somewhat larger than the opening in the knob so the edges can be bent and pushed down inside. Be careful not cut it too small, I almost ruined this one by cutting it too close.
I bent the edges of the screen down a bit with needlenosed pliers and then worked it into the opening. I centered one of the squares in the screen over the hole in the knob and then pressed an awl through it to open up the center area for the mounting bolt.
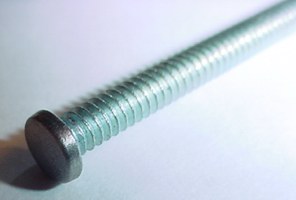
Next I found a long #6-32 round head screw for mounting and holding the screen in place in the mic. I used my 1" emery belt sander and ground the head down flat to get rid of the screw slot and then reduced the diameter some too.
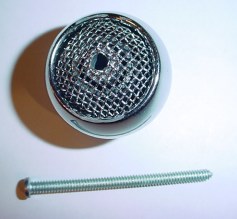
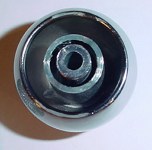
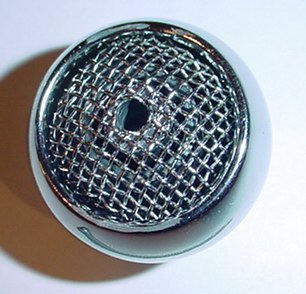
Here are the finished pieces, except for painting.
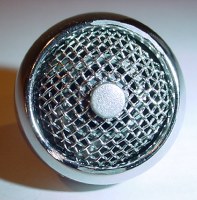
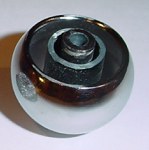
Slip the bolt into it and there you go, a neat looking fake mic. After all we all know the mic on the robot never really worked anyway!
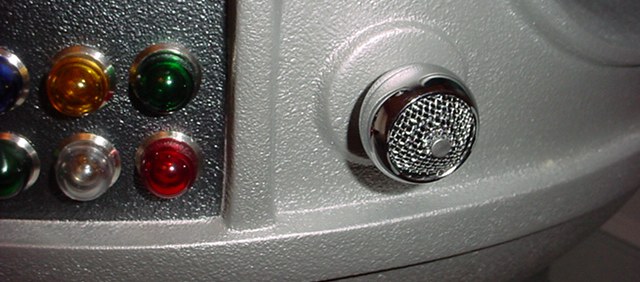
Mounted to the torso, washer and nuts on the inside hold the screen in place and hold the knob to the torso. I enlarged the front of the hole on the torso with a countersink for the round back of the mic to set into slightly. It looks so good chrome, I hate to paint it. If I hadn't scraped the chrome edges when modifying it I probably wouldn't paint it, even though the original robot had a painted microphone.
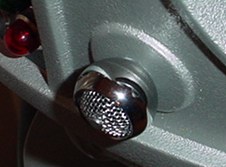
This gives an idea how it fits to the torso.

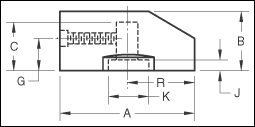
Dimensions in Inches
A
|
B
|
C
|
G
|
J
|
K
|
R
|
1.500
|
.625
|
.500
|
.281
|
.094
|
.625
|
.750
|
depth
|
.500
|
base diameter
|
.820
|
Not to much to say about the knob, I had the exact knob in a box of stuff from the 60's, so it's an "original". For all I know the knob I have was from the same production run of knobs as the one used on the original B9 robot on the show!
Below are some places that sell them
|
B9 Builders Club $4.25 includes shipping.
|
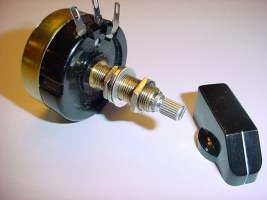
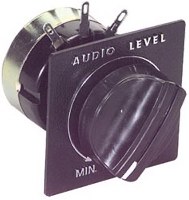
I am also using a speaker L-pad volume control potentiometer, mainly because I had it and it has a long threaded shaft on it. I needed that due to the thickness of my torso where it mounts. It could have many uses in the robot electronically other than a mono volume control (you can get them in stereo too). That's up to you. This one has limited power usage as an L Pad, 15 Watts. If I use it as a volume control that will be plenty of wattage capability as I don't plan on using a high power amp or stereo for my robot's voice.
An L-pad is rather old simple resistive technology and is wired in the speaker output circuit and may not be practical for modern high power amps due to the size required to handle more power. They are also a very inefficient way to control volume, using power and dissipating it as heat.
Unicorn Electronics is a source for the potentiometer for $4.50,
this one has a 1" long bushing on it so between two nuts it should fit pretty much any torso.
I understand now that Unicorn has a minimum order of $25, if you're not buying anything else from them you may want to use Parts Express below. They are cheaper $3.35 too and have no minimum order amount.
Item #: 11-3000
 |
Monaural 15 Watts
RMS at 8 Ohms
Mounts in 3/8" panel hole
1" long threaded bushing
complete with mounting nuts
Includes black plastic contour knob (You can toss this in the trash!)
2-1/8" dial plate finished in matte silver and black is supplied (toss this in the trash too!)
|
|
|
Same as above. Toss the knob and plate.
 $3.35
+$0.99 handling
+ shipping
|
It could have many uses in the robot electronically other than a mono volume control (you can get them in stereo too). That's up to you.
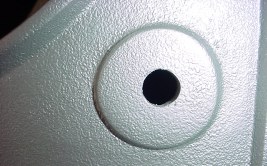
Of course when I drilled the original hole for this, I did not get it centered. So I enlarged it to center it.
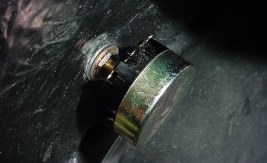
Here is the pot mounted in the torso, notice the washers in place because of the oversized hole.
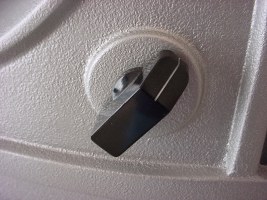
The knob in place.