Bob's Lost In Space B9 Robot Project | home
Misc. Parts | Motor Shaft Extensions | Knees & Hinges | Treadsections | Tread Making | TreadMaking from Tires | Drive Parts | Drive & Tread Installation | Tread movie | Barry's Tread Movies | Drive Upgrade | Legs | Donut & Waist plate | First Stackup | Torso | Neon | Arms | Microphone & Knob | Chest Buttons | Power Pack | Torso Vents Misc | Making Vents | Large Vent Drawings | Arm Mechanism #1 | B9 Arm Mech Dev. | Wrists & Claws | Collar | Radar | Motorizing Ears | Making Sensors | Brain | Brain Cup & Light Rods | Bulbs & Wiring Diagrams | My Old Robots | B9 Builder's & Info Sites | Related Links | Building Reference Info | Parts Drawing Links | Site Revisions | Final Leg Assembly | Leg & Hip Assembly | Leg-Hip Action | Non-B9 Projects | 2008 TX BUILD-OFF | 2008 TX BUILD-OFF PAGE 2 | RoboCon 2009
Making Rubber Treads
This is how I am making my first set of rubber treads. But I am really doing this just to see if I could.
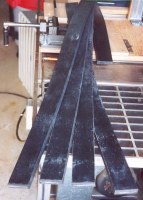
Here is the raw material. 1/2" thick x 2" wide x 36" long commercial grade neoprene rubber strips (80 durometer rating). Available through McMaster Carr Part number 8981K197 @$11.34 each. You'll need 6 or 7 strips 36" long. Pairs get joined end to end (step joint between 2 slots) and one will get cut down the middle to make the two 1" wide treads-after the slots get cut in it. More on joining and cutting later.
(Note: If you can find a local rubber supplier that can make or get you much longer pieces that would save making several joints.)
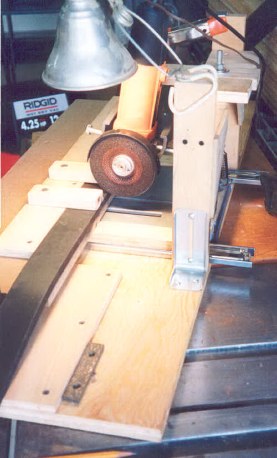
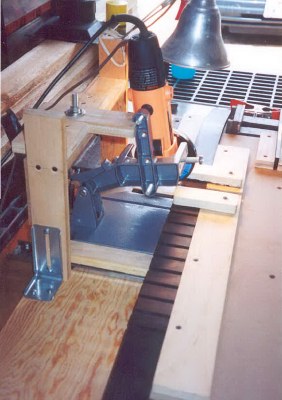
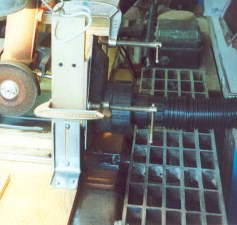
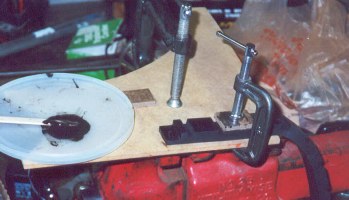
Next I had to make a table for a grinder that would allow me to cut 1/4" slots in the rubber strips. I used a $20 4-1/2" grinder from Harbor Freight tools with their $8.99cutoff grinder stand (both on sale). I bolted the stand to a board and made a bracket over the top of the grinder to allow it to be set to a specific depth. I also purchased a 4-1/2" dia. x 1/4" thick grinding wheel for about $3 at Home Depot.
From the picture above you can see the ball bearing drawer slides (Home Depot-better quality, about $14) that I mounted a board to, so it would slide in and out to cut the slots. The rest was scrap wood and various brackets and stuff laying around. Sort of a poor man's milling table.
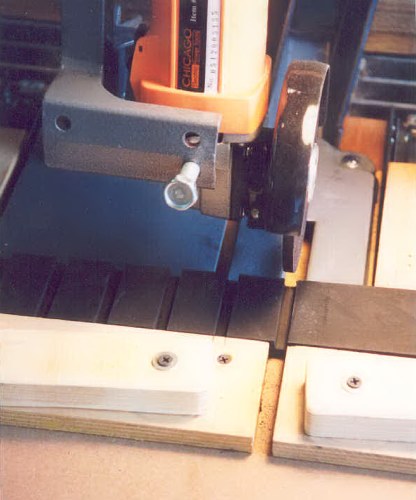
Here's a front view that shows my drill press vise I bolted to the side. I attached a bar in place of the cleat on the moveable jaw so I could use the vise screw to move the table in and out to cut the slots. This is necessary to control the cutting. I had just enough travel with my vise plus a little extra to do the 2" wide slots. Got lucky.
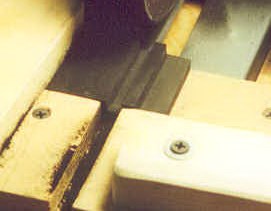
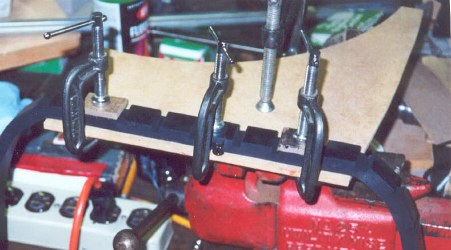
Here's a view that shows the upper wooden stop to hold the grinder to a depth. Notice I slotted the piece and put a bolt through it for easy adjustment. I also notched the front where the grinder rests to give some stability.
I've already cut some slots here. They come out very nice!
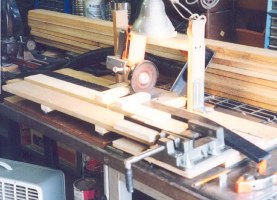
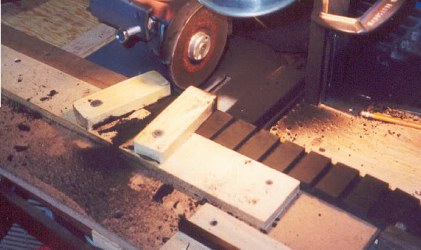
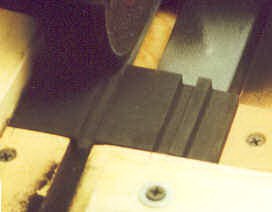
This shot shows the 1/2" thick pieces of plywood I screwed to the milling table to hold the rubber strip. Also my clamps for the strips are very simple pieces of scrap mounted with one drywall screw & washer so they can pivot. They're tightened fairly snug, so I can still rotate the clamps out of the way to move the rubber strip for each cut.
I simply pencil marked the position so I could just move the strip to the left for the next cut. Each slot takes 3 passes to get to 1/4" deep.
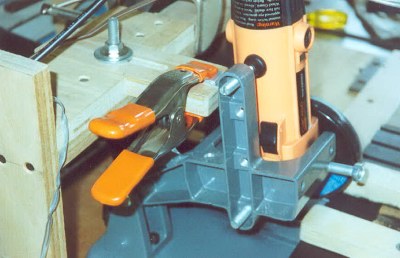
I set my upper stop for the depth of the first pass, and increase the depth for each successive pass by clamping a piece of metal the proper thickness behind the arm of the cutoff stand. It's quick and unsophisticated and does the job!!
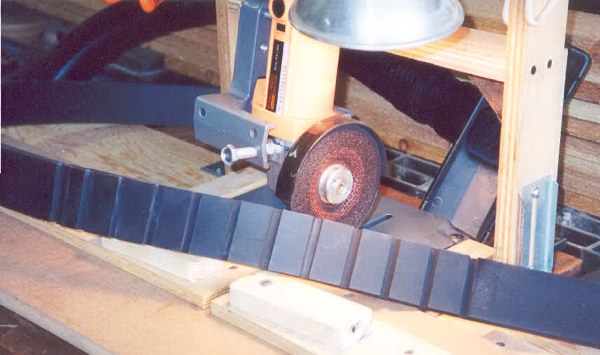
12 slots cut! I haven't cleaned off the rubber yet, there is still some rubber dust from cutting on it.
Speaking of dust, you can see my shop vac hose attachment behind in this photo. You must use a vac to do this, it creates huge amount of rubber residue which gets all over everything if it is not vacuumed while you are cutting the slots. I clamped a vacuum pickup attachment to the back and used my shop vac.
Use Ear Protection.
I used a large set of old headphones that block out most all the noise. Running a 4.5HP shop vac plus the grinder (which is as noisy as the shop vac), just about deafens you after a short time. And it will take several hours to actually cut all the slots.
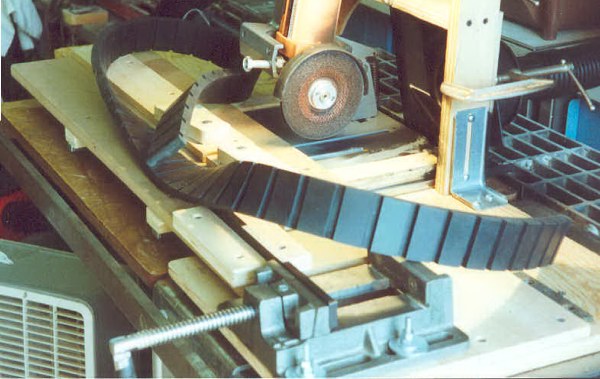
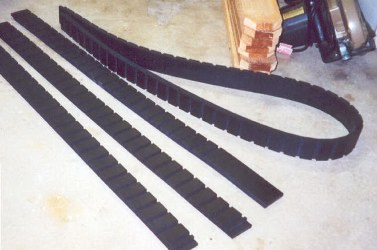
Here's 72" worth of slots. The length you'll need depends on your treadsection & wheels design and how much length you need if you're going to use the treads as drive belts.
To measure, put the wheels in your treadsections and wrap a tape measure around the wheels to get the dimension you need.
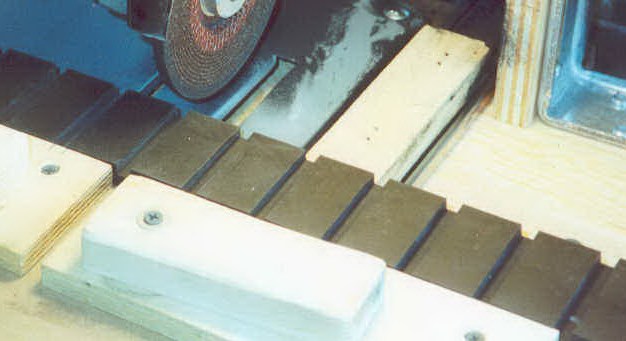
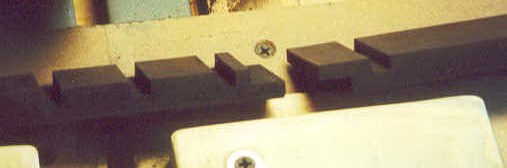
Close up.
Finally got all the slots cut, it does get a bit messy even with the vacuum. I ended up borrowing a bar stool and piping music to my headphones, because it took a long time, several sessions to cut all these slots!!
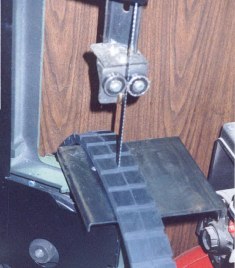
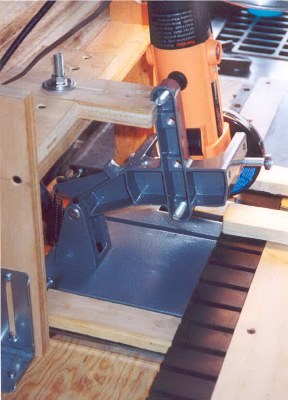
Here, I am cutting a 2" tread into two 1" treads. I'm using a metal cutting bandsaw with a fine tooth blade. I just drew a guideline down the center of the rubber and hand fed it without any type of guide. The rubber from McMaster Carr may be slightly wider than 2" anyway, so there is plenty for the width of the blade cut. You have to cut fairly slow anyway.
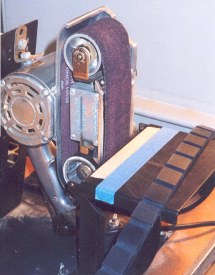
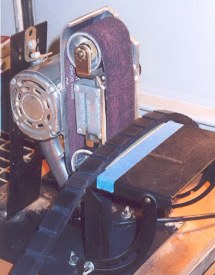
I set up my belt sander stand with a 50 grit aluminum oxide belt to smooth the cut edges of the rubber. Notice that I put a piece of tape on the table at 1" from the belt, so I could see when I was at the finished width. Actually I'm finish sanding the edges to slightly less than 1" wide to give a little play in the wheels. I don't want a real tight fit. I'm using this same setup at 2" for the wider treads also.
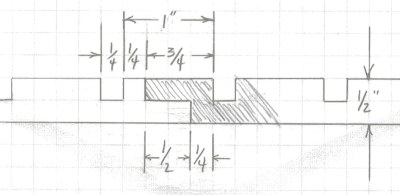
The Lap joint layout (actually called a step joint).
(See my revised notes below about joints and cements.)
(See my revised notes below about the new tread pad widths I am using on my next set of treads to fit cogged drive wheels.)
Cutting the step joints. (Sorry my flash didn't go off.)
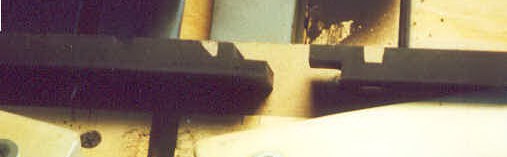
Here is how they work.
Another view. You can see that you don't have much room to do a step joint between two of the 1/4" groves. My joint is 1/2" wide. You can use a fine file or a 1" emery belt sander to fine tune the fit of the joint if necessary.
(See my revised notes below about joints and cements)
This is the glue I used for the joints. It is a 2 part - pre-packaged in a dual package for a useable amount. Comes 10 packs in one package for $10.80. Available from McMaster Carr Part number 7493A35. It sets in 8 minutes, handling strength in 45 minutes and fully cured in 7 days. Rough up the surface of the joints and glue and clamp the joints, and leave them alone for a week. Excess glue can be sanded off.
Note: There may be other/better glues or cements out there for this purpose.
(See my revised notes below about joints and cements)
Instructions.
Here's how I set up to glue the joints.
1. The rubber is flexible, so you have to clamp it back from the joint to keep it from moving.
2. Then I cut a packet of glue, mix and apply liberally to all surfaces of joint. You have about 8 minutes to work with the glue before it sets.

3. Next gently press fit the joint together and clamp back from the joint to hold it end to end.
4. Last position and gently clamp the joint and allow excess glue to ooze out. Do not over tighten the clamp, otherwise you will deform the rubber and have a poor joint. I have also used waxed paper under it and under a small wood block on top of the joint itself, especially on the 2" wide tread joints.
5. Leave it clamped for a couple of hours, then remove the clamps & carefully unstick it from the board/waxed paper and set it aside where the joint will lay flat to cure.
6. Do not disturb for a week until it cures.
7. Any excess glue can be sanded off on the emery belt sander later.
(See my revised notes below about joints and cements)
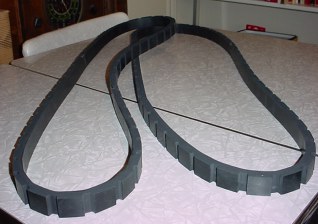
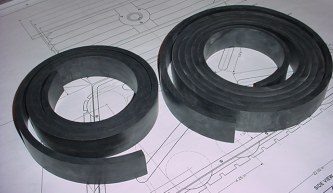
Here are my first set of finished 1" wide treads.
Here are the 2" treads, I'm gluing together.
I have been told by another club member that "cold vulcanizing cement" available from rubber suppliers is much better and stronger when used on a diagonal angle cut joint about 1 to 2" long through the 1/2" rubber (rather than a step joint like I did above). Let it cure at least a week and it has been very successful. He has metal treadsections and is using home made treads in a similar fasion to mine.
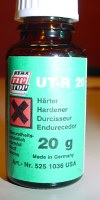

The 2 part cement was $31. It is SC 2000 Black Cement and the Hardner is UT-R 20. Made in Germany. Name on containers is Rema Tip Top/North America Inc., Northvale N.J. 07647. I have never found this anywhere else, but the rubber company uses it in their shop. I'll give it a try on my next set of treads.
I bring this up because during my V belt drive testing I had one of my seams begin to crack and separate under tension. Only one out of 4 seams on my 2" treads cracked, but I believe the others may have eventually given away. (Now my treads are too short for my other drive setup with the center drive pulley.)
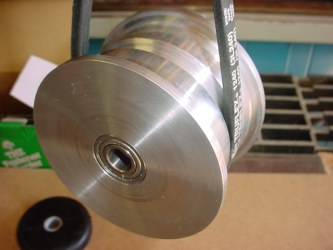
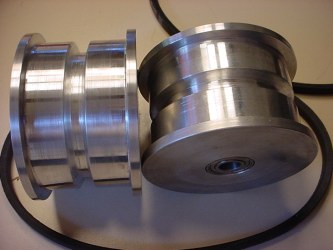
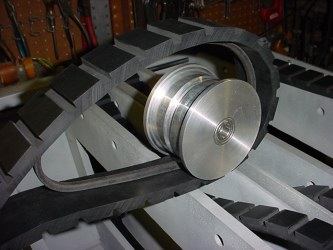
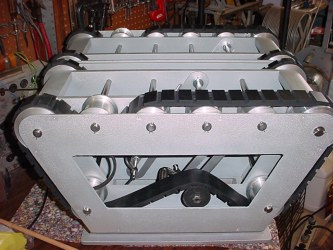
Pictures of my V belt driven wheels setup. It was very nice, too bad that I couldn't get proper tension on the treads to keep the drive pulleys from slipping inside the treads under load. I assumed that the weight of the robot would create enough pressure between the floor, tread and wheel to eliminate slipping, it would not under all conditions. The V belts themselves have tremendous gripping power between the motor pulley and the V groove in the drive wheels.
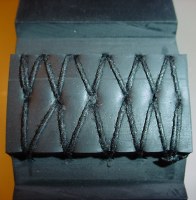


I took my original treads to a shoe repair shop and had the seams stitched with heavy black thread, it's not the prettiest thing and not the best solution, but I didn't want to reglue them at the time I was testing tread drives. I don't really like them and am afraid that after much use as driven treads that are tensioned over the pulleys that the holes where the stitches go through will start to rip out and the tread will tear apart.
For the Drive Upgrade.
I have recently found a local rubber supply shop where I had them cut 2" wide by 1/2" thick by 90" & 180" long, 60 durometer rubber strips, approx $51 total (cheaper than McMaster Carr if you can find a local shop that has it). I am going to make another set of treads, so I have only one joint in them. I will also be using 0.846" +/- 0.02" wide tread pads with 0.25" wide slots for the purpose of fitting my new cogged drive wheels as seen on my Drive Upgrade page.
Original club members were making the tread pads 1" wide. Later 3/4" wide tread pads were determined by club members to be a more accurate dimension from detailed analysis of robot photographs. Certainly anything in this range is acceptable and the difference wouldn't be noticeable anyway.
Go to Drive Parts