Bob's Lost In Space B9 Robot Project | home
Misc. Parts | Motor Shaft Extensions | Knees & Hinges | Treadsections | Tread Making | TreadMaking from Tires | Drive Parts | Drive & Tread Installation | Tread movie | Barry's Tread Movies | Drive Upgrade | Legs | Donut & Waist plate | First Stackup | Torso | Neon | Arms | Microphone & Knob | Chest Buttons | Power Pack | Torso Vents Misc | Making Vents | Large Vent Drawings | Arm Mechanism #1 | B9 Arm Mech Dev. | Wrists & Claws | Collar | Radar | Motorizing Ears | Making Sensors | Brain | Brain Cup & Light Rods | Bulbs & Wiring Diagrams | My Old Robots | B9 Builder's & Info Sites | Related Links | Building Reference Info | Parts Drawing Links | Site Revisions | Final Leg Assembly | Leg & Hip Assembly | Leg-Hip Action | Non-B9 Projects | 2008 TX BUILD-OFF | 2008 TX BUILD-OFF PAGE 2 | RoboCon 2009
Radar
I decided to make my radar from a combination of plywood, masonite, MDF (medium density fiberboard), pvc and roof flashing because they are easy materials to cut and shape. Here's a series of pictures on the process. You can get the dimensions from the B9 Builders Club site in the construction techniques section or from Dave Painter's blueprints, and from my text below.
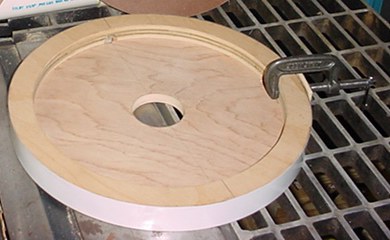
1. First I cut 2 circles 12-3/8" diameter, one from 1/2" plywood & one from 3/4" plywood. I used my bandsaw. These will form the 1-1/4" thick center of the radar.
2. With my sabresaw I cut out the center of the 3/4 circle leaving a 1" wide ring & drilled a 2-1/8" hole in the center of the 1/2" circle (you may want to use a 2-1/4" center hole depending on how you are supporting your bubble & if your radar will rotate with the bubble-I'm not having my bubble rotate with the radar). I glued and nailed these 2 pieces together.
3. Then drilled the 5/8" holes for the ears in the center of the 1-1/4" edge @ 180° from each other, you can see my lines and one hole toward the back of this picture. It is easiest to do this on a drill press, but you could do them freehand with a hand drill (be careful-the plywood grain will make your drill wander when doing it by hand, I actually did my first 2 holes this way & they didn't stay centered, so I rotated it 90° & did 2 more on the drill press.
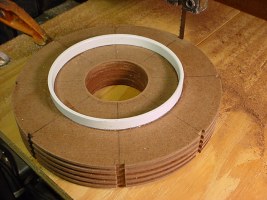
4. Next I cut a strip of roof flashing 1-1/4" wide long enough to go around the circles. You can cut this with scissors, what I had around was prepainted white, but any will do. Then I just used GOOP to glue it on and it is clamped end to end in the photo above. I'll sand and fill the joint with a little Bondo before painting. (Note all the ear holes-including my mistakes-are covered at this point.

Now I cut the top and bottom 12-5/8" diameter radar plates from 1/8" hardened masonite. Note that these are larger than the center circles with centers cut out to match.
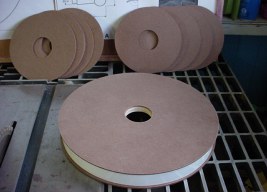
Two sets of upper radar circles also cut from 1/8" masonite, 5 of each size, 6-7/8" & 7-1/8".
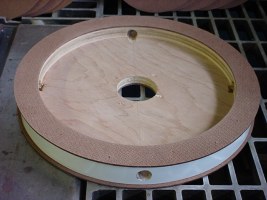
I've attached the top and bottom circle plates to the center section with glue and small nails. (You can see my 2 ear holes here that were a mistake in the left & right side, they were off center.)

I simply drilled through the flashing with a smaller bit and used my dremel and a rat tail file to finish out the hole in the flashing to match the hole previously drilled in the wood. The actual size of these holes depends on the ears you're using or making.
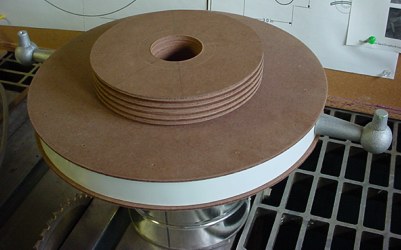
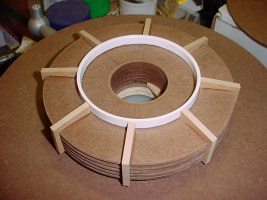
Here's a stackup of the upper radar circles and the ears stuck in place.
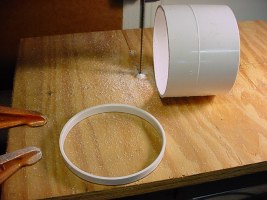
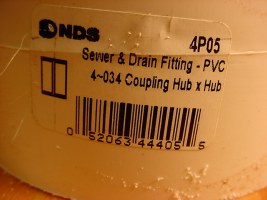
Now I needed a center ring for the upper radar that was 4-1/4" i.d. and 4-1/2" o.d. and 3/8" high. I found a PVC fitting in guess where (Home Depot) that was exactly that size. I just sliced a piece off of it 3/8" wide and laid it flat on a piece of sandpaper to smooth and flatten the cut edge.
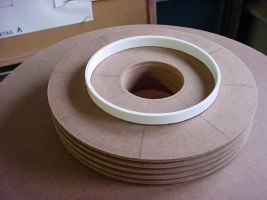
Here's how it fits on. Glued on with GOOP.
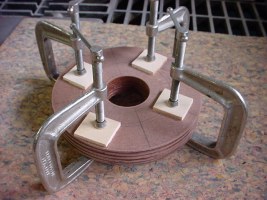
I took a PVC coupling and wrapped duct tape around it to match the diameter of my center hole and used it to stack the discs on and keep them centered while I glued them with wood glue. Clamp and clean off any excess glue that squeezes out.
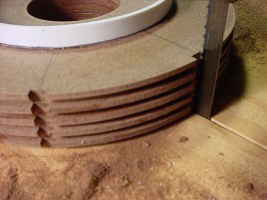
Next I used the bandsaw again to cut out the slots for the upper radar ribs. Rather than notching each rib to fit around the discs, this is much easier. Just don't make them too wide or you'll have gaps, better to be a little on the too narrow side and you can file or sand it or the ribs to fit.
I used 1/4" MDF to make the ribs. It cuts with a nice edge and sands to a nice machined looking finish. You need 8 of these. It is best to measure your upper radar assembly and cut these to fit your's. On mine the side vertical portion is 1/4" wide x 1-3/8" high to the outside corner and tapers up to 1-9/16" at the top.
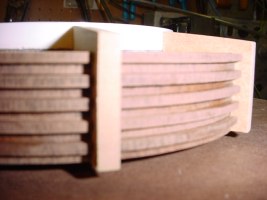
I sanded & fine tuned each one & its' notch to fit properly and glued them in place with wood glue.
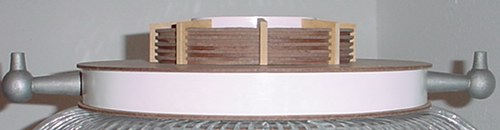
I centered the upper radar on the lower radar and fastened it on with four 1-1/4" drywall screws from underneath. Be sure to pre-drill pilot holes for these because the masonite is very hard and they won't go in properly if you don't.

Another view.
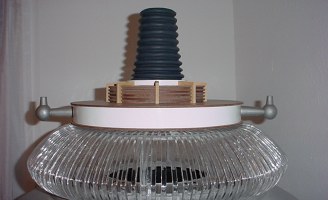
Next will be to sand the flashing and give the whole thing a primer coat, texture and sand and then a finish coat of paint. I will do the ears separately.
The radar textured and painted. In this photo original cast aluminum ears are not painted yet.
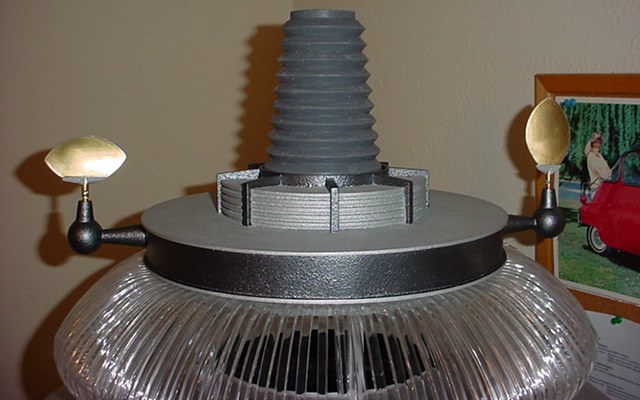
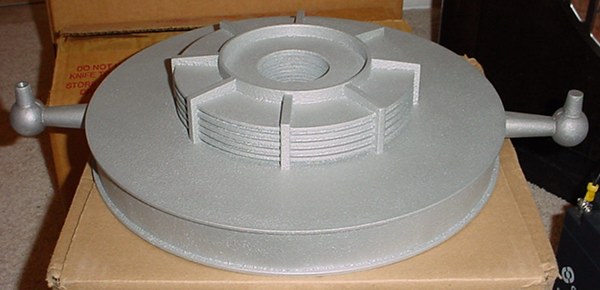
Radar and wood motorized ears trimmed out and painted with Duplicolor Gunmetal T177. I simply masked off the radar to spray the gunmetal color. Holders and radar dishes awaiting painting.
Cast Aluminum Ears
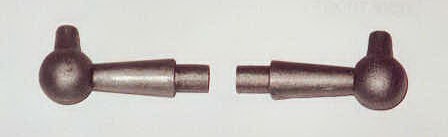
These are my original ears from cast aluminum (from club member Bill Kendzierski). Not much finishing needed. I am not currently using these, instead I am using the wood motorized ones I built from scratch. See Motorizing Ears page.
The casting has somewhat of a textured finish which will match the rest of B9s texture.
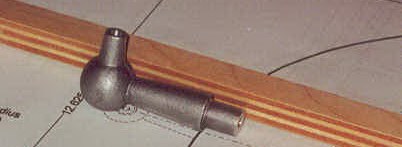
I drilled this one for miniature motor to turn the spinner. It is difficult even with a drill press and difficult to center the hole properly too. I like the metal parts, but you might consider making these out of resin since it's easier to drill.
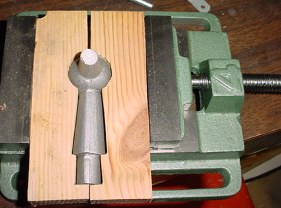
This is the simple clamp setup I made to hold the ears to drill the holes in them. This prevents getting vise marks all over them. I did not make the ears I'm using, they were cast from aluminum by another club member.
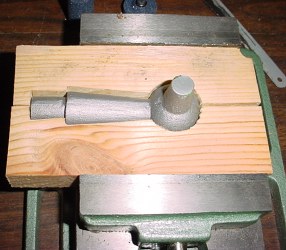
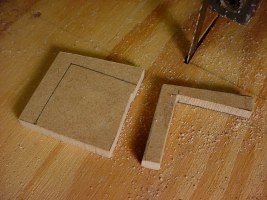
Just traced the shape on to a board, drew a line down the center and cut the 2 pieces out on the jigsaw.
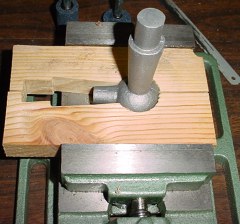
You can use the same setup to hold it vertically to drill the long hole. It is critical that you get it perfectly vertical in both planes so you drill straight. Best to use a drill press, center punch and drill a pilot hole first. Set the depth so you don't drill through. If you're using a hand drill, just be careful to stay aligned and watch your depth.
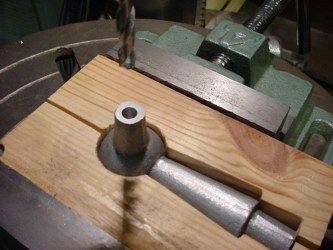
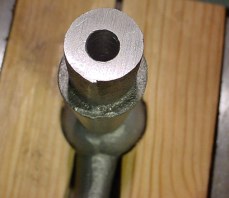
Here is my result after drilling the first one. It is not perfectly centered, but then again the ear post is not perfectly round either. I used a 1/4" diameter bit, but if you are using MicroMo motors for rotating the ear dishes, hole should be sized may to fit the motor.
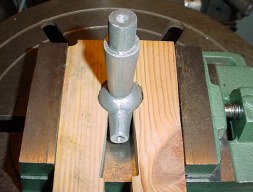
You do want the holes to intersect each other. You might be interested to know I purchased this vise at Harbor Freight Tools for $4.99 +tax on sale ($10.99 regular on their website). It's a great vise for a cheapie even if you don't have a drill press.
I will keep the textured cast aluminum finish look, as my radar is textured too. I like the look of the casting. These will go on my stunt robot.
Go To Motorizing Ears