Bob's Lost In Space B9 Robot Project | home
Misc. Parts | Motor Shaft Extensions | Knees & Hinges | Treadsections | Tread Making | TreadMaking from Tires | Drive Parts | Drive & Tread Installation | Tread movie | Barry's Tread Movies | Drive Upgrade | Legs | Donut & Waist plate | First Stackup | Torso | Neon | Arms | Microphone & Knob | Chest Buttons | Power Pack | Torso Vents Misc | Making Vents | Large Vent Drawings | Arm Mechanism #1 | B9 Arm Mech Dev. | Wrists & Claws | Collar | Radar | Motorizing Ears | Making Sensors | Brain | Brain Cup & Light Rods | Bulbs & Wiring Diagrams | My Old Robots | B9 Builder's & Info Sites | Related Links | Building Reference Info | Parts Drawing Links | Site Revisions | Final Leg Assembly | Leg & Hip Assembly | Leg-Hip Action | Non-B9 Projects | 2008 TX BUILD-OFF | 2008 TX BUILD-OFF PAGE 2 | RoboCon 2009
The whole point of this was to find an inexpensive way to make driveable treads that do not stretch. Actually I'd been hoping someone else would try it, but no one had so I finally gave it a try.
I cut up an old steel belted radial tire of approximately the right circumference and made the 2" drive treads out of it as an experiment. They work great and do not stretch at all and are a continuous loop (no end joining required).
They vary in look from the original but really don't look bad at all. The nice thing is I can drive the leg/treadsection up a ramp into the van and even carefully go over door thresholds. Tread stretching under heavy loads is no longer a problem.
First thing is to find a tire of the right size.
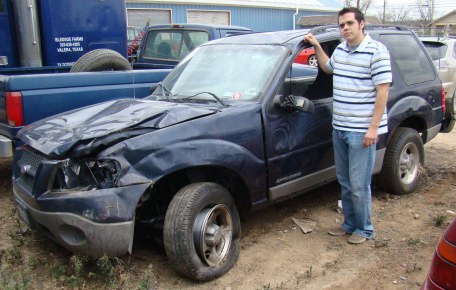
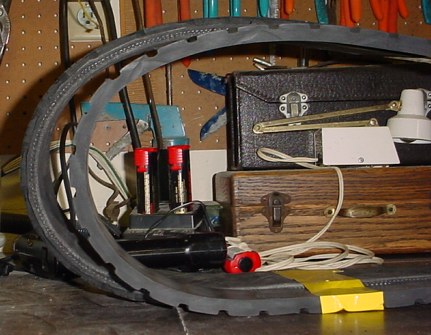
My neighbor's son rolled his SUV and unfortunately it was totalled. The spare tire sat around for a few weeks and he gave it to me. First I measured the outside circumference of the tire. Then measured my treadsection drive path to see if the tire was even close. My measurement was within a few inches. I was in luck, I could take up a little slack in the treadsection. I decided to give it a try.
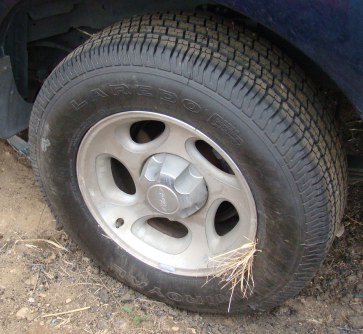
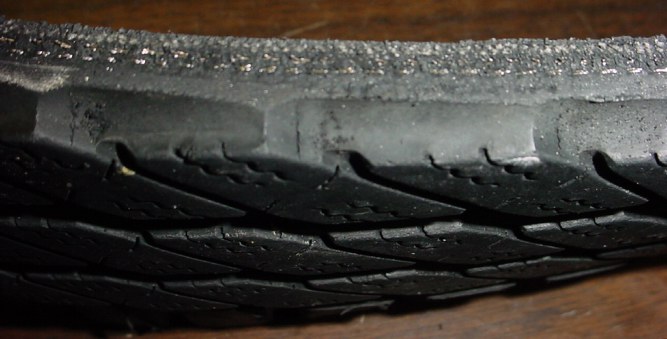
The tire I used is a P235/70R16 104S
The O.D. of the tire was 90-3/8" and the O.D. of my old tread belts is 86-3/4. 3-5/8 difference without compensating for the difference in thickness. The tire tread is 5/8" thick which is thicker than my old 1/2" thick tread belts. This is actually better as the B9 treads should be 5/8" thick.

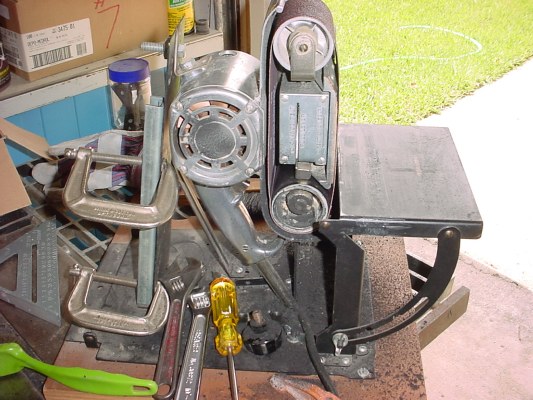
First thing I did was to cut the sidewalls off the tire with a jigsaw and fine tooth metal cutting blade. I ended up with the wide portion of the tire tread approx 4" wide and a continuous loop.
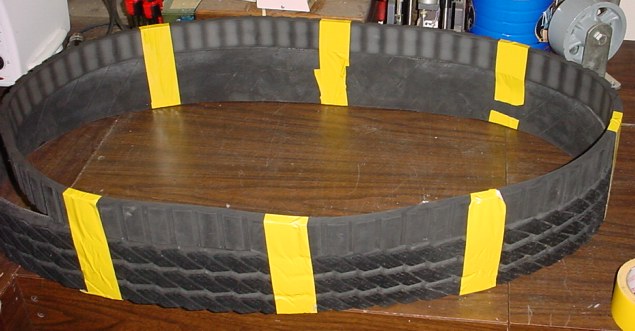
I taped together my old tread and the new belt to see actuall how close they were in circumference.
You can see how much longer the new tread (back) is than my original (front).
The rough cut edge before sanding with belt sander.
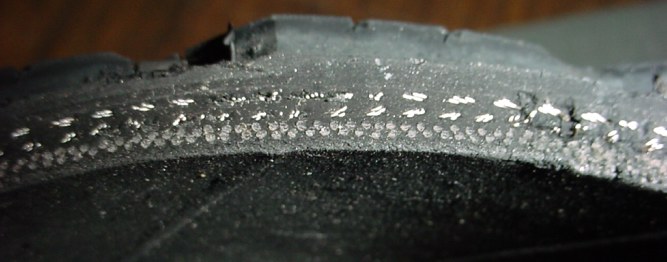
The cut edge showing the steel belts after initial belt sanding, these are very sharp prior to sanding. I sanded the edges of the wide belt before working with it to cut it into the 2" treads.
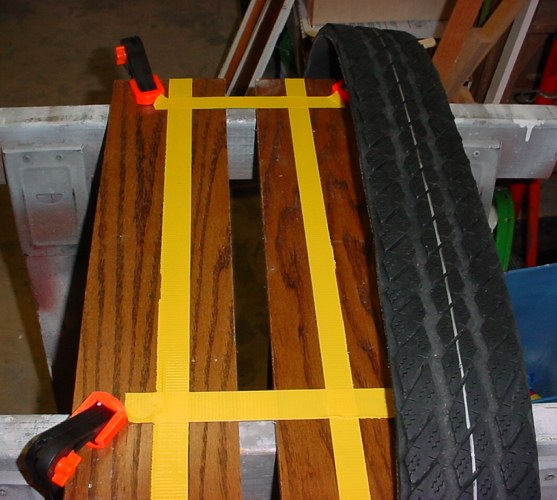
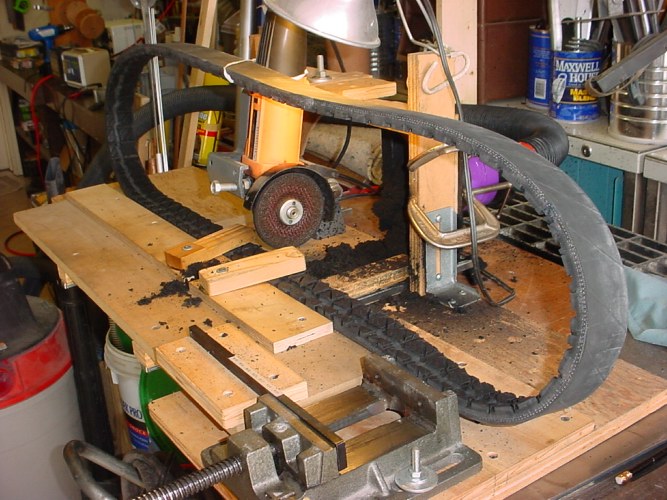
Next I set up the sawhorses and a primitive guide to use with the jigsaw. I marked the tread down the center to cut it into two 2" wide treads. This particular tire produced two treads that were not quite 2" wide. Some time in tire selection and using a wider tire would be better.
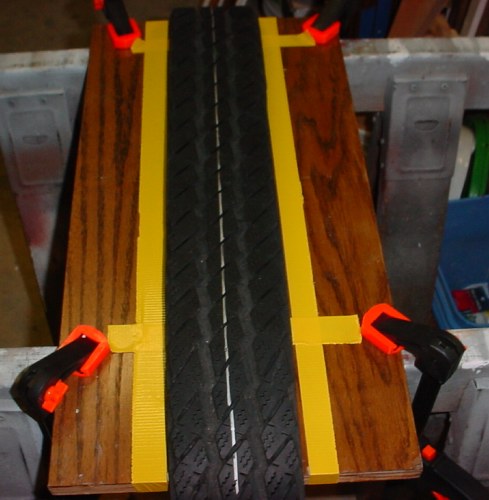
Setup for cutting.
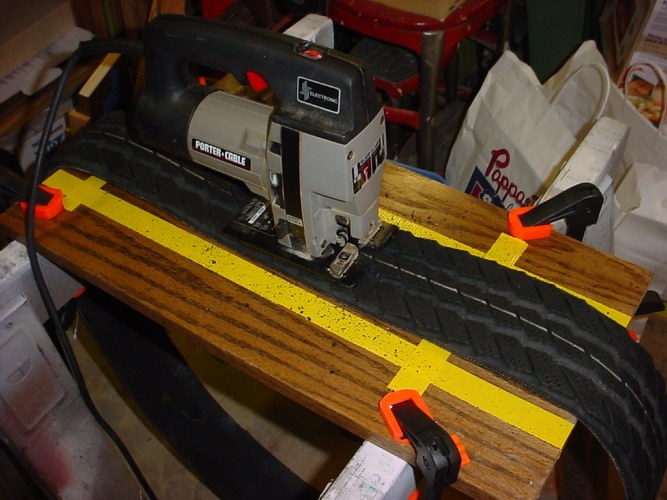
Cutting through the center line with fine tooth metal cutting blade in the jigsaw. Note how the tread is looped over the top and under the sawhorses. This way you can cut the length of the jig and rotate the tread to continue cutting. The initial plunge cut was very difficult to do, but with care, a steady hand and some patience it can be done. First cutting rubber, then down through the steel belts. The steel belts catch the blade teeth so you have to be prepared for hitting them and maintaining control of the saw.
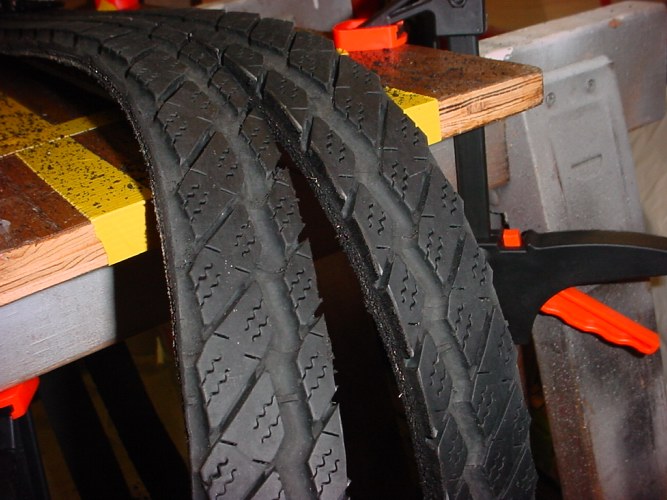
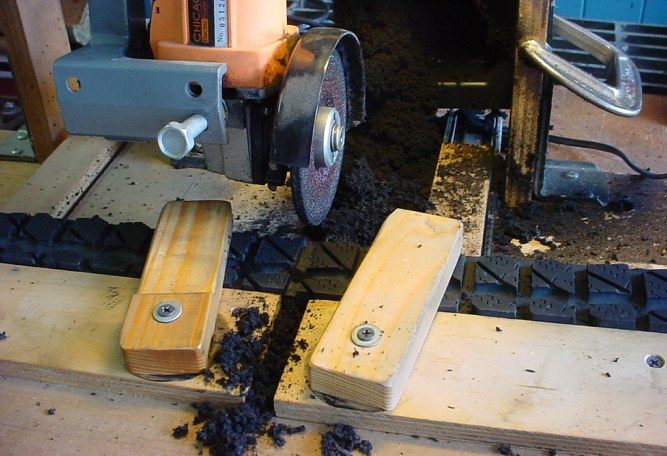
Here is the freshly cut tread. You can see some of the pieces of steel belting sticking out. And they are very sharp until sanded smooth.
Another pic of the rough cut.

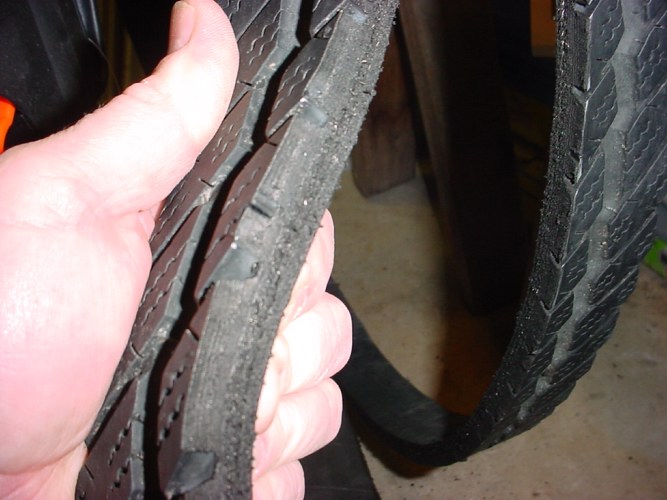
Almost done with splitting into two. As you can see this is also a messy process. When cutting the tire, the rubber is more "sticky" in nature than the plain neoprene used for the original treads. Gums up on your saw but doesn't cause any problem.
I ran the good edge along the belt sander to true it up before cutting the grooves in the treads. That way I would have one edge to square from.
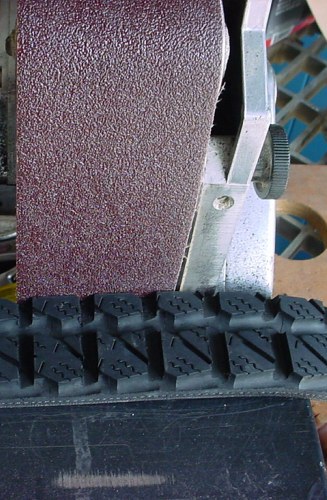
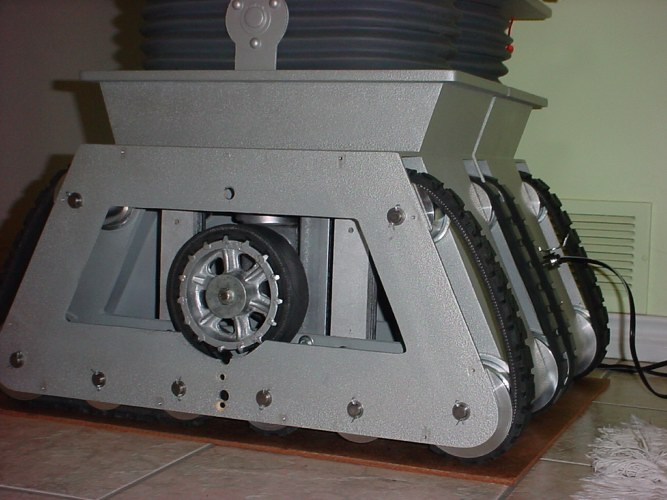
Next I turned the belts inside out to run them through and cut the slots to fit my sprockets and look a bit more like B9 treads. I used the best edge I sanded to line up on the jig. I did several test fits to make sure these would work with my sprockets. Getting these to come out and to fit the sprocket and evenly divide out on the length I had to work with was not easy. Of couse the other issue is that the square groove design was for looks not for function to be driven by a sprocket. And due to that and the fact that these treads do not stretch, the grooves do not always stay engaged on the teeth, but if they skip a few it doesn't matter. This thing keeps on going.
Very messy and the different nature of the tire tread rubber compound likes to clog the grinding wheel.
Sanding the edges smooth is essential. It also takes down the ends of the steel belts.
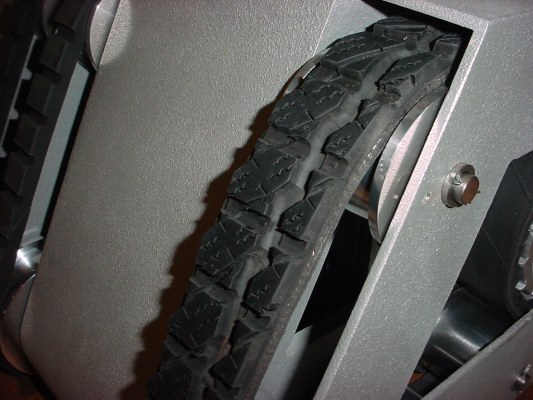
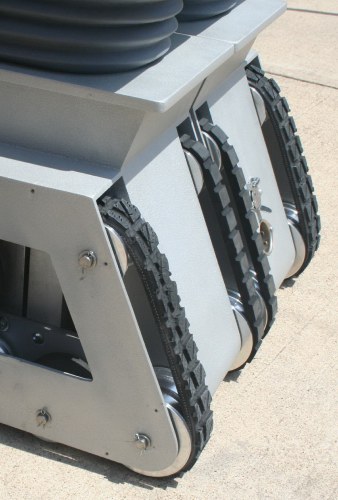
Treads Installed.
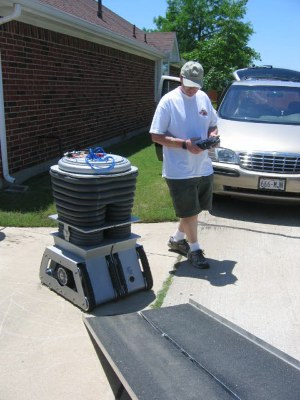
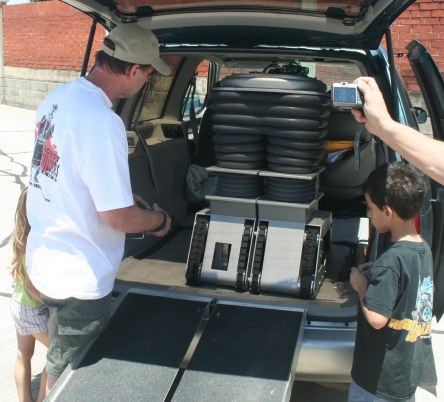
Up the ramp into the van at the end of the Buildoff.
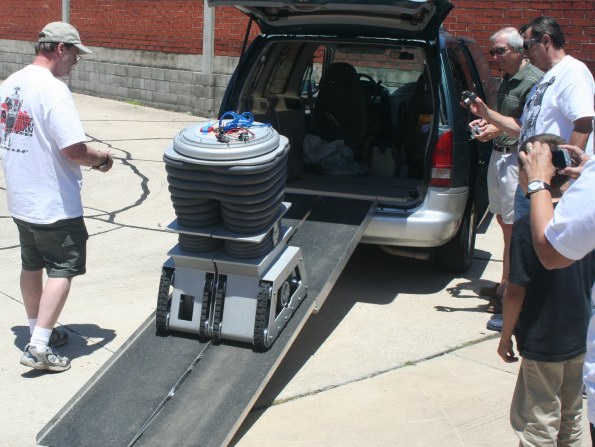
I have a little alignment problem on the left tread, but I think that is due to variation in my rough cut when I cut the sidewalls off the tire. This was a just a quick experiment prior to the buildoff.
If you are on dial up this will take 17 minutes plus to download. Big file something over 5MB. Thanks to William C. at the buildoff for the video.