Bob's Lost In Space B9 Robot Project | home
Misc. Parts | Motor Shaft Extensions | Knees & Hinges | Treadsections | Tread Making | TreadMaking from Tires | Drive Parts | Drive & Tread Installation | Tread movie | Barry's Tread Movies | Drive Upgrade | Legs | Donut & Waist plate | First Stackup | Torso | Neon | Arms | Microphone & Knob | Chest Buttons | Power Pack | Torso Vents Misc | Making Vents | Large Vent Drawings | Arm Mechanism #1 | B9 Arm Mech Dev. | Wrists & Claws | Collar | Radar | Motorizing Ears | Making Sensors | Brain | Brain Cup & Light Rods | Bulbs & Wiring Diagrams | My Old Robots | B9 Builder's & Info Sites | Related Links | Building Reference Info | Parts Drawing Links | Site Revisions | Final Leg Assembly | Leg & Hip Assembly | Leg-Hip Action | Non-B9 Projects | 2008 TX BUILD-OFF | 2008 TX BUILD-OFF PAGE 2 | RoboCon 2009
Collar
Thanks to all of the club members that have made their collar and documented it on their sites before me. I researched all of them and it made the process fairly easy for me. I would highly recommend Dave Painter's LIS robot drawings unless you have a CAD program and can create your own.
This is a very rewarding part of the construction, it's a lot of fun to make. Don't worry about perfection, after it all comes together you can't see the small variations and the original wasn't perfect anyway.
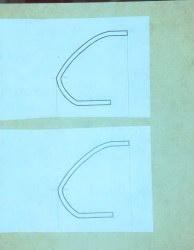
My collar is made in the usual way, I started with a jig made from Dave Painter's drawings to create the ribs. I used 1/4" MDF with a couple copies of the pattern spray glued to the board and cut it out on my jig saw.
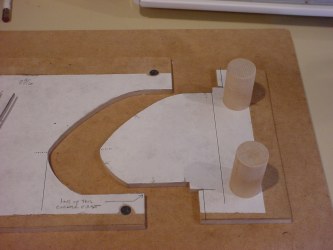
I used some 1" dia dowel to put handles on it, these help greatly in pushing against the plastic to form the ribs. I made my jig to use an exact length of plastic rod so I would not have to trim the pieces after they're formed. It is a little tricky doing it this way.
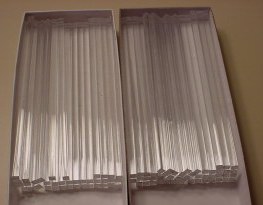
I started with 108 pieces of 1/4" square extruded acrylic bar which I purchased from McMaster Carr item number 8728K13. They come in 6 foot lengths for $1.05 each. I bought 20 lengths and with shipping it was $30.28 (The extras I'll use for the torso vents). I cut them on my bandsaw to 8-11/16". To determine the length, I measured the jig and formed 2 or 3 ribs to get to the exact length.

Here's the first 10. It took making 4 ribs to get the temp of my toaster oven set and get the length right. I ended up using 200 degrees F at 3-1/2 minutes. Too hot and you'll get bubbles, too cool and you can't bend it quick enough. Start with 175 degrees for acrylic and go from there. Ovens vary, so yours may be different. If one doesn't bend correctly or cools to quickly before you get it formed, just pop it back into the oven and reheat it. I reformed several in the process.
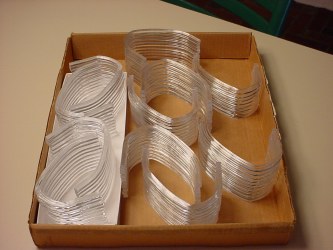
Here they are, all 108 of them. I only wasted the first 4 of them getting temp and length correct. Don't be fooled these take some time. After I got them in the jig and formed into place, I used another piece of 1/4" mdf to push down over the top of it to keep the rib flat. I did many one at a time, until I got my technique down, then began to do up to 5 multiples by placing additional ribs in the oven 30 seconds apart from the first one. I did have to increase the time to 4 minutes with more than one in the oven.
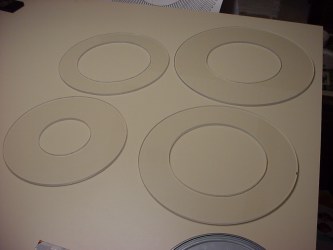
Top & bottom 1/4" acrylic circles for the support frame, cut outer edge on bandsaw with simple jig using a nail in a center hole. Used the same technique with my jigsaw to cut the inner holes. Top is 11" diameter with 4-9/16" center cut out so it supports the 9" lazy susan that will also support the radar. Next is a 12" dia with 8" center cutout glued to the 11" one which provides a 1/2" lip for the ribs to glue on. Next is the upper bottom ring at 15" dia with 8" center cut out and last is the very bottom ring 13" dia with 8" center cut out, then you have a 1" lip where the ribs glue.
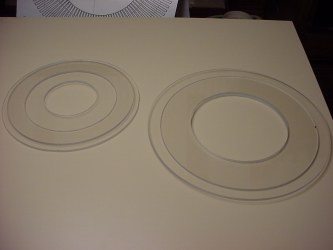
Here's how they stack together.
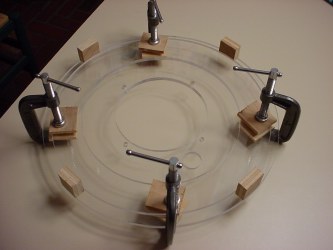
I used GOOP brand adhesive to glue the entire collar together. (Note that I have also drilled the holes to mount the 9" radar bearing on the top piece before assembly.) To glue these I put 4 large pea size blobs of GOOP and gently pressed together allowing the GOOP to spread. I used the 1/2" plywood blocks to center the top piece on the bottom one and gently clamped it in place. Do not over clamp it, just enough pressure to keep it in place.

Bottom done same as above.

It is upside down here. When gluing the vertical supports, I applied the GOOP generously and used gravity to hold it in place. Make sure your vertical support pieces are the correct length so your ribs will fit the support setup. This will make assembly much easier, eliminating the need for clamping or holding ribs in place when they're glued on.
With my top circle cut with a smaller diameter hole in the middle for the lazy susan to mount on, you will need 4 supports 3/4"wide x 3-7/8" and 4 support pieces 3/4" x 3-1/8". Depending on how your ribs come out you may need to vary the height of the supports slightly for best fit of your ribs. I wouldn't glue my supports in place until I made the ribs so I could check the height with a dry stack up first.
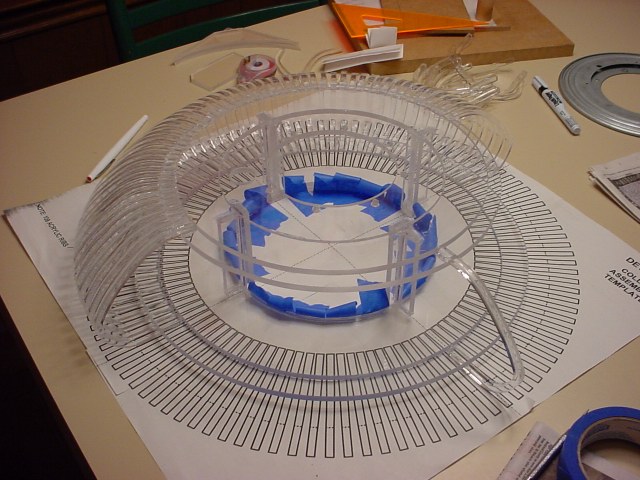
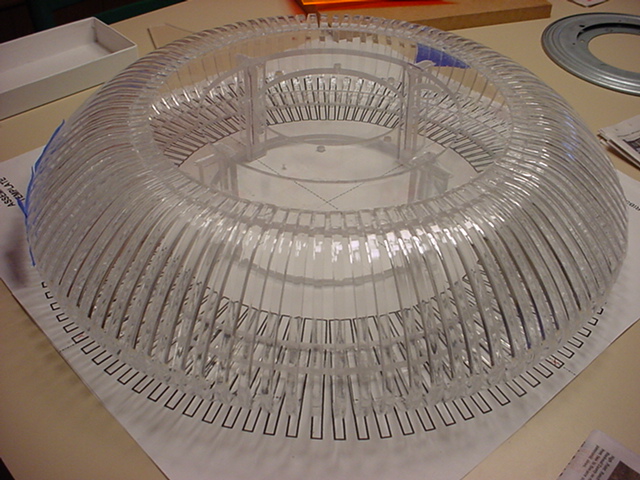
Using Dave Painter's layout, I taped my collar frame to the center of it. That way I could lift the outer edge of the frame to place the ribs with GOOP on them under the bottom without moving the pattern-but allowing it to drop out of my way. I just put the GOOP out of the tube on the ribs top and bottom and put the bottom in place first and the top second. Don't be afraid to be generous with the GOOP it dries clear, and in my opinion a little extra is better than not enough. Every so often you can check it with a square to be sure they're vertical.
If you don't have the drawings and need a layout of the 108 ribs for the collar, click on the link above to download a file I created on my CAD program since the drawings on the collar from the club are no longer being sold and this is not on the clubsite. The first page shows how the layout goes together and the following 6 pages in the file can be printed out on 8.5" x 11" paper, trimmed and taped together to create a 100% scale layout of the 108 ribs.
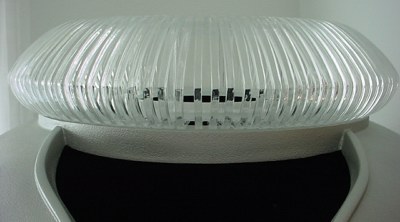
Finished.
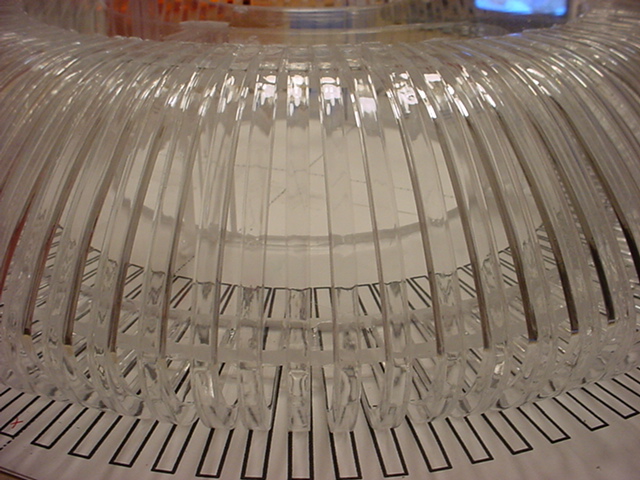
A close up.

Finished. I used a little tape here and there to hold spacing on the ribs until they dried.
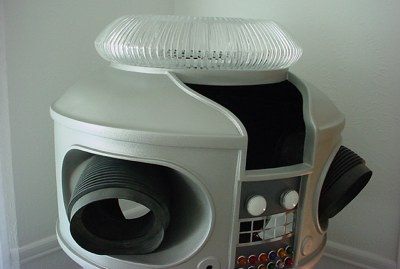

Very Neat!
Go to Radar