Bob's Lost In Space B9 Robot Project | home
Misc. Parts | Motor Shaft Extensions | Knees & Hinges | Treadsections | Tread Making | TreadMaking from Tires | Drive Parts | Drive & Tread Installation | Tread movie | Barry's Tread Movies | Drive Upgrade | Legs | Donut & Waist plate | First Stackup | Torso | Neon | Arms | Microphone & Knob | Chest Buttons | Power Pack | Torso Vents Misc | Making Vents | Large Vent Drawings | Arm Mechanism #1 | B9 Arm Mech Dev. | Wrists & Claws | Collar | Radar | Motorizing Ears | Making Sensors | Brain | Brain Cup & Light Rods | Bulbs & Wiring Diagrams | My Old Robots | B9 Builder's & Info Sites | Related Links | Building Reference Info | Parts Drawing Links | Site Revisions | Final Leg Assembly | Leg & Hip Assembly | Leg-Hip Action | Non-B9 Projects | 2008 TX BUILD-OFF | 2008 TX BUILD-OFF PAGE 2 | RoboCon 2009
Starting with a club made brain cup, I saved a lot of headaches, but of course it costs $ to do that. Still I am glad I went that route because the brain cup gives me a sturdy base to build from. The brain cup I used was an earlier design and I saved a few $ that way.
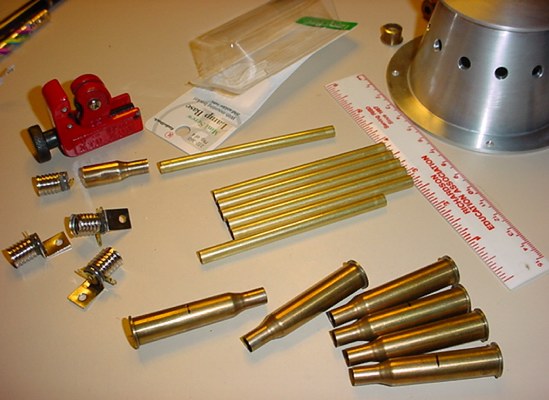
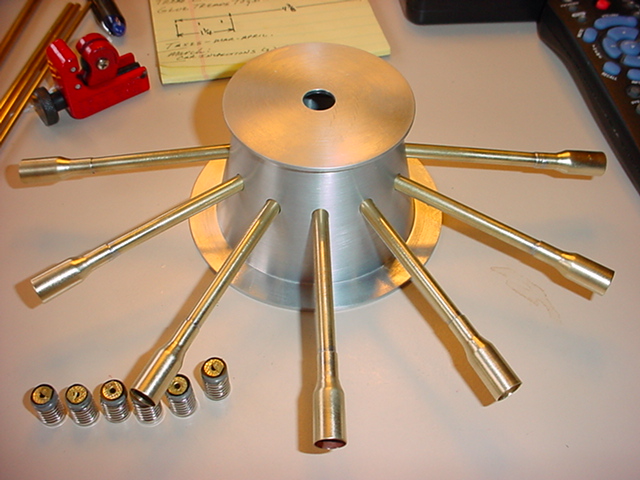
Here are the components I used. Since I am using shell casings for my socket holders I made appropriate modifications to the standard drawing by Craig R.-click on this link to see it Finger Light rods 2 . I really like the tapered look of the shells over just nested tubes.
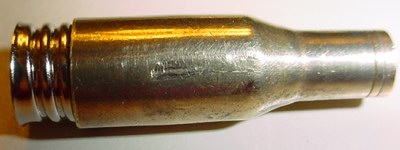
These are the shell casings I used and got from my friend Krag.
Also here is a list of what other members have used for this method:
1. Weatherby .257 cartridge's ($22.00 for twenty) that I got from the reloading store.
2. Cut down .257 Roberts shell case soldered to 1/4'' brass tube it fits perfectly and the screw thread bulb base slides snugly into the shell case.
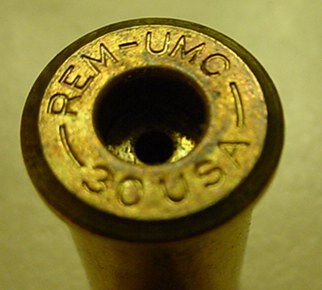
3. I used 30-06 casings and they worked perfect for the light rods. The primer punch hole is .25 so the brass rod fit nice and snug.
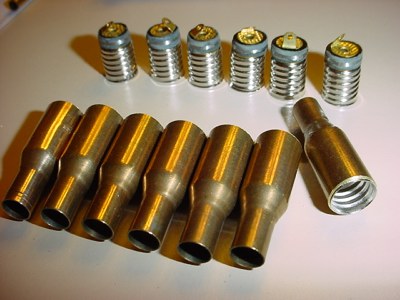
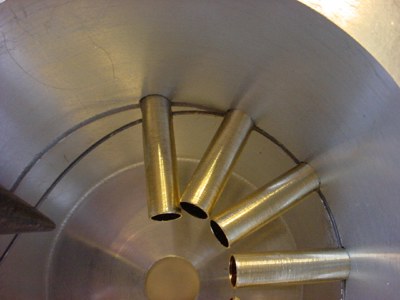
I cut down the shell casings on the bandsaw to 1-1/4" and cleaned up the ends on the belt sander. Also after modifying the light sockets they are a perfect fit.

Here is a before and after shot of the light socket modification. Note the sockets are from Radio Shack see Bulbs page.
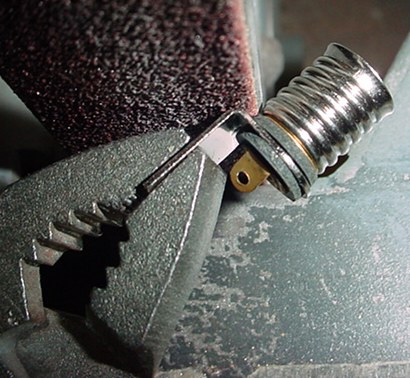
Again the 1" belt sander with emery belt is perfect for this type of stuff. To remove the bracket grip it with pliers and grind partly through the right angle bend. Then you can easily break it off.
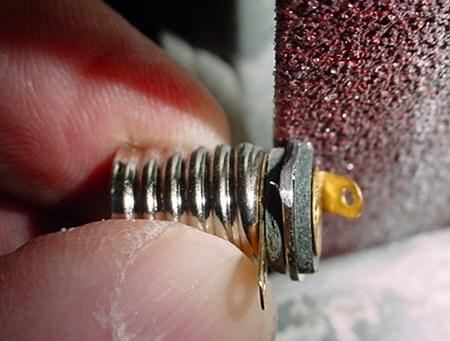
Now it has to be ground down to a little smaller than the diameter of the socket. The shell casings are tapered toward the back so this will make it fit. This is a good way to sand your fingers. See next pic.
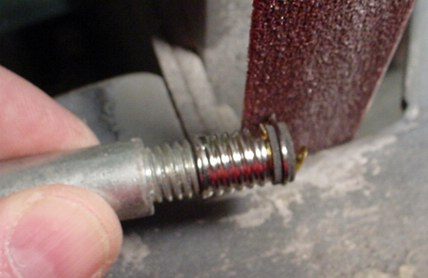
To save my fingers I found a bolt that would screw into the socket to hold it for sanding. Much easier.
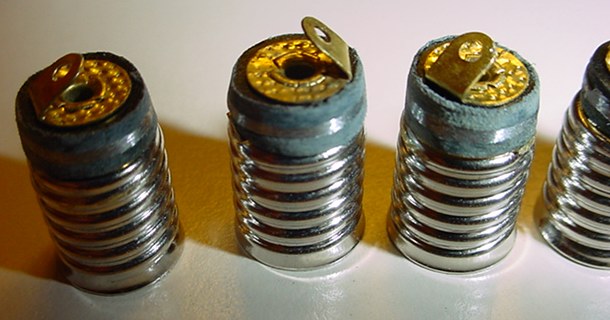
This is the way you want them to look. I will be using the brass rod as the ground for the light, so just one wire will be connected to the socket.
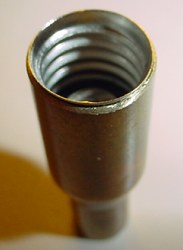
This shows the snug fit into the casing. That will provide the ground (after cleaning the inside of the case with emery paper) and no other fastening should be necessary. You can see the mark on the side of this case where I tried to chuck it to cut them - use a saw it is easier. The force of a chuck on the tapered shell tends to crush it.
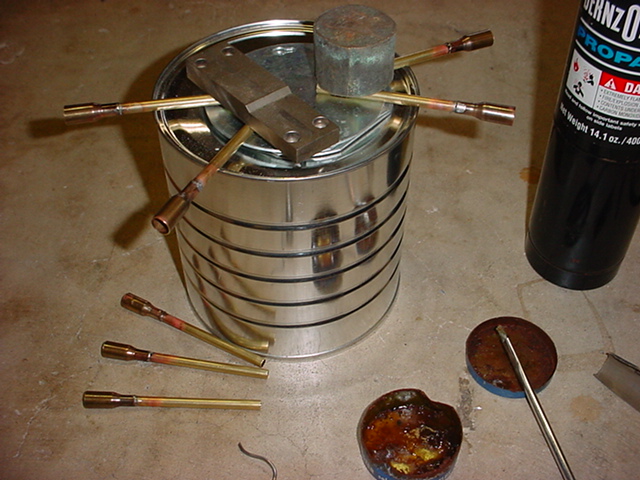
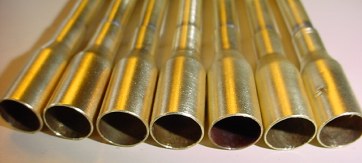
Next solder the casings to the rods. Use emery paper to clean the end of the tubing and the inside of the shell case. Then use a paste flux on both pieces, set the length and solder them together. (Of course do not put the light sockets in them before you do this!)
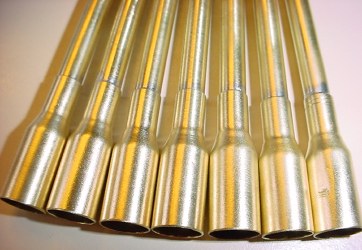
Then use emery paper and wire wheel to clean them up. Kind of a shame to paint them.
Also wash them with dish soap and water and use a brush or rag to clean the inside. It is best to clean any remaining flux so there will be no problems with paint or the wiring.
To assemble the rods to the cup, I drilled 0.052" diameter holes 13/16" in from the ends of the tubes on the drill press. Then used 0.032 spring music wire from the hobby shop to thread through all the tubes and spring into the holding slot in the brain cup. Another reason why I decided to purchase a machined cup. [Note-0.052 dia. is bit #55 just slightly larger (.005") than 3/64". 3/64" would work too.]
In addition they had .025" wire you could use with a 1/32" bit for the hole, but I wanted a little sturdier pivot support on the rods.
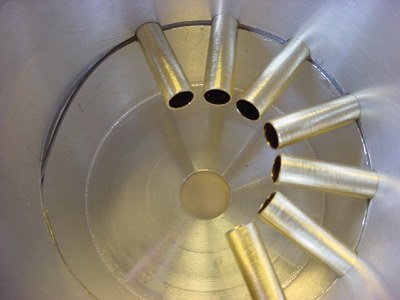
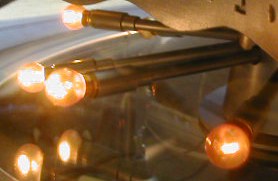
In Place.
Here is the overall assembly. You will note that the brain cup does not have holes in the top of it for push rods to mechanically operate the light rods. If I use the typical cam operation, I will be drilling those holes. Details to come later.
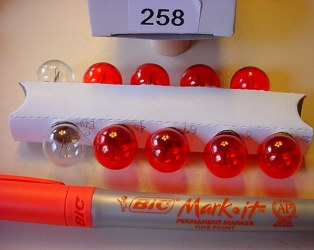
I found an orange Bic permanent marker and used it to color the flashing bulbs that will go into the light rods. Kind of hard to tell the real color here they look more red than orange, but they are orange. I'll have to see what they look like lit up.
There are lots of other options. Below are other members comments about coloring the bulbs:
I found an orange Sharpie(R) gave excellent results... Coloring the bulbs with an orange Sharpie closely approximates amber...
Gwen M.
|
I tried the paint and the sharpie marker, and I must say the results are
far better with the Sharpie, AND its much easier to do as well.
Craig R
|
They have always looked amber to me, but I have seen people use red. You can get Krylon stained glass paint. The colors are very good. You can buy it at craft shops. By the way it comes in spray cans.
Scott S
|
I guess its marker over paint, but the stain glass paint is excellent, and it is clear. The colors to me are dead on, amber, red, and green.
Ken F
|
I used a red Sharpie.
Brett W
|
I used this for the finger lights and lights on top of the brain.
It works well if you are looking for an amber color (1 coat) or a deeper orangie-amber color (2 coats).
I actually dipped my bulbs rather than painting them.
Brian C.
|
For what its worth I love the Krylon orange. It worked great.
Tim B
 Pic of Tim's Krylon Orange lights.
|
I used Sharpies for coloring the two chest lights red and green, but the
Krylon stained glass paint is great for when the bulbs actually show. I
tried a few others, but this one looked spot-on. You can build up deeper
color with more coats if you like. I got mine at Hobby Lobby. My brain
light page http://www.markthompson.us/B9 has lots of info.
Mark T.
|
More to come.
Alternate socket covers
If you can't get shells or prefer the squared off look over the taper and alternate method is to nest tubing.
This one is by Mike L. : .........."ended up buying a series of nesting brass tubes and soldering them together. I used solder paste from Radio Shack and a small butane torch. There are pictures and a lengthy description and measurements at:" http://ripsaw.cac.psu.edu/~mloewen/B9/Brain.html#tubes